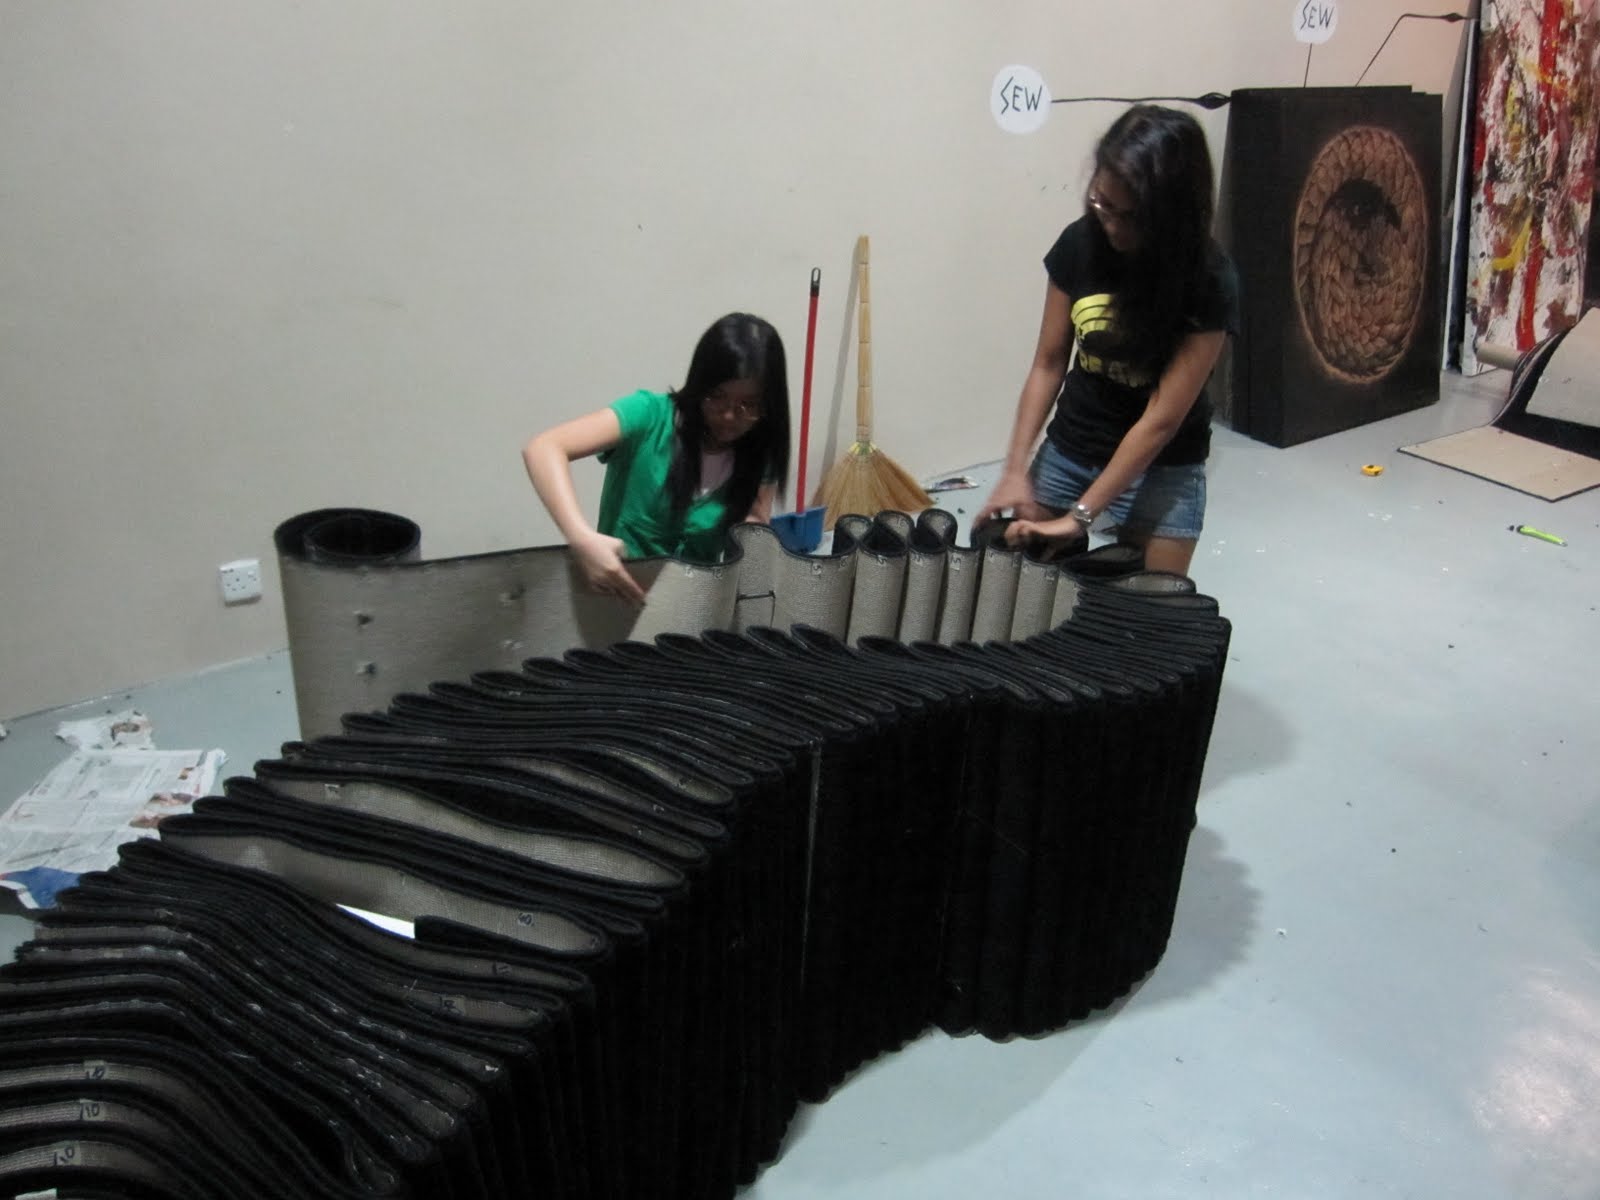
The bench is almost done!!


 Thanks to my group members and an additional help from Harshil, the bench has been nearly completed with only left the repositioning of the bench into an upright position. Nonetheless, additional 3 meters of carpet will be ordered again to finish up the top part of the bench. So total length used for the carpet will be 83 meters long!
Challenges and difficulties
The group started making the bench during the study week and ended after the final presentation week. Total operational days of making the bench was 7 days. Hands-on making the bench wasn't easy at all. It seems like the sketch model that we made couldn't really provide the accurate measurements to make the bench as the actual material of the bench is different from the material we used for our sketch model.
Problems start to occur ever since we started the bench but somehow we manage to face it and solve it till the end. After all, what is design - making without having problems to face? Below are the main problems we faced and problem solving solutions done to overcome them.
1. 80 meters of carpets were really heavy which makes us harder to move the carpets around for measurements and cutting of carpets
Problem solved - 80 meters of carpet were cut into several sections and rolled into bundles so that its easier to drag them around and install them.
2. The carpet materials were predicted to be insufficient.
Problem solved - Several parts of the design were least of least functional usage and doesn't require heavy usage of carpet. The top part of the design was meant for a covering and not for seating. The top part of the design uses smaller foldings which help save material. It also help decrease the weight acted from the top part of the design so that the steel rods wouldn't brake.
3. 2 steel rods actually break in the process of making! The problem was due to the poor wielding of steel rods back in the factory. We called the owner but he couldn't help us if the steel rods weren't send back to his factory.
Problem solved - Each broken steel rods were clamped with 2 large 10mm U - clamps to join them back.
4.The shape of the design was too dynamic. Not all the MDF boards could fit into the steel rods. At the measuring stage, we tested to fit in all the boards into the steel rods to see how the shape goes but as we know that the curvature of the design obstruct us from doing so.
Problem solved - The MDF boards were sent back to the timber factory several times to specially customize and cut them to fit in the steel rods. Using attachment and detachment method, the boards can be easily detach and fit into the steel rods without having to fit through the tip of the steel rods. Screws were used to tighten the attachment of the boards. ( see visuals for clearer image)
5. After inserting the MDF boards into the design. The boards create large openings which can be seen from the side.
Problem solved - The side of the carpet where the boards were laid were sewed with needles and thread to cover the obvious.
The 'Making' stages:
Day 1 - Transport materials and equipments to Publika studio
Day 2 - Fixing the boards to steel rods to see the shape of design
Day 3 - Measuring the carpet according to stages and poke holes into it
Day 4 - Measuring the carpet according to stages and poke holes into it
Day 5 - Fixing the carpet into steel rods, measuring the carpets and placing the MDF boards into design
Day 6 - Fixing the carpet into steel rods, measuring the carpet and placing the MDF boards into design
Day 7 - Fixing the carpet into steel rods and measuring the carpets
The next step
The next step will be tilting the bench into upright position and fit in the last 3m piece of carpet into the design. Currently, discussing with Publika on how to manage the bench as the bench is very heavy and requires a lot of manpower.
Pictures


Read more


 Thanks to my group members and an additional help from Harshil, the bench has been nearly completed with only left the repositioning of the bench into an upright position. Nonetheless, additional 3 meters of carpet will be ordered again to finish up the top part of the bench. So total length used for the carpet will be 83 meters long!
Challenges and difficulties
The group started making the bench during the study week and ended after the final presentation week. Total operational days of making the bench was 7 days. Hands-on making the bench wasn't easy at all. It seems like the sketch model that we made couldn't really provide the accurate measurements to make the bench as the actual material of the bench is different from the material we used for our sketch model.
Problems start to occur ever since we started the bench but somehow we manage to face it and solve it till the end. After all, what is design - making without having problems to face? Below are the main problems we faced and problem solving solutions done to overcome them.
1. 80 meters of carpets were really heavy which makes us harder to move the carpets around for measurements and cutting of carpets
Problem solved - 80 meters of carpet were cut into several sections and rolled into bundles so that its easier to drag them around and install them.
2. The carpet materials were predicted to be insufficient.
Problem solved - Several parts of the design were least of least functional usage and doesn't require heavy usage of carpet. The top part of the design was meant for a covering and not for seating. The top part of the design uses smaller foldings which help save material. It also help decrease the weight acted from the top part of the design so that the steel rods wouldn't brake.
3. 2 steel rods actually break in the process of making! The problem was due to the poor wielding of steel rods back in the factory. We called the owner but he couldn't help us if the steel rods weren't send back to his factory.
Problem solved - Each broken steel rods were clamped with 2 large 10mm U - clamps to join them back.
4.The shape of the design was too dynamic. Not all the MDF boards could fit into the steel rods. At the measuring stage, we tested to fit in all the boards into the steel rods to see how the shape goes but as we know that the curvature of the design obstruct us from doing so.
Problem solved - The MDF boards were sent back to the timber factory several times to specially customize and cut them to fit in the steel rods. Using attachment and detachment method, the boards can be easily detach and fit into the steel rods without having to fit through the tip of the steel rods. Screws were used to tighten the attachment of the boards. ( see visuals for clearer image)
5. After inserting the MDF boards into the design. The boards create large openings which can be seen from the side.
Problem solved - The side of the carpet where the boards were laid were sewed with needles and thread to cover the obvious.
The 'Making' stages:
Day 1 - Transport materials and equipments to Publika studio
Day 2 - Fixing the boards to steel rods to see the shape of design
Day 3 - Measuring the carpet according to stages and poke holes into it
Day 4 - Measuring the carpet according to stages and poke holes into it
Day 5 - Fixing the carpet into steel rods, measuring the carpets and placing the MDF boards into design
Day 6 - Fixing the carpet into steel rods, measuring the carpet and placing the MDF boards into design
Day 7 - Fixing the carpet into steel rods and measuring the carpets
The next step
The next step will be tilting the bench into upright position and fit in the last 3m piece of carpet into the design. Currently, discussing with Publika on how to manage the bench as the bench is very heavy and requires a lot of manpower.
Pictures


Testing out the shape of the bench

Measure approximately the distance needed for every foldings by indicating the value on masking tapes
 Using T square to align the other side of the measurement

 Using T square to align the other side of the measurement
Look at all the tape used for the bench!

Measuring the length of folding and the placement of holes


Draft paper that has the measurements in cm
 Items used on the making of bench (notice Chatime is one of it ;) )
 A tough start to insert the carpet into the steel rods


Kian Min, Jackyin, Ash
 Items used on the making of bench (notice Chatime is one of it ;) )
 A tough start to insert the carpet into the steel rods


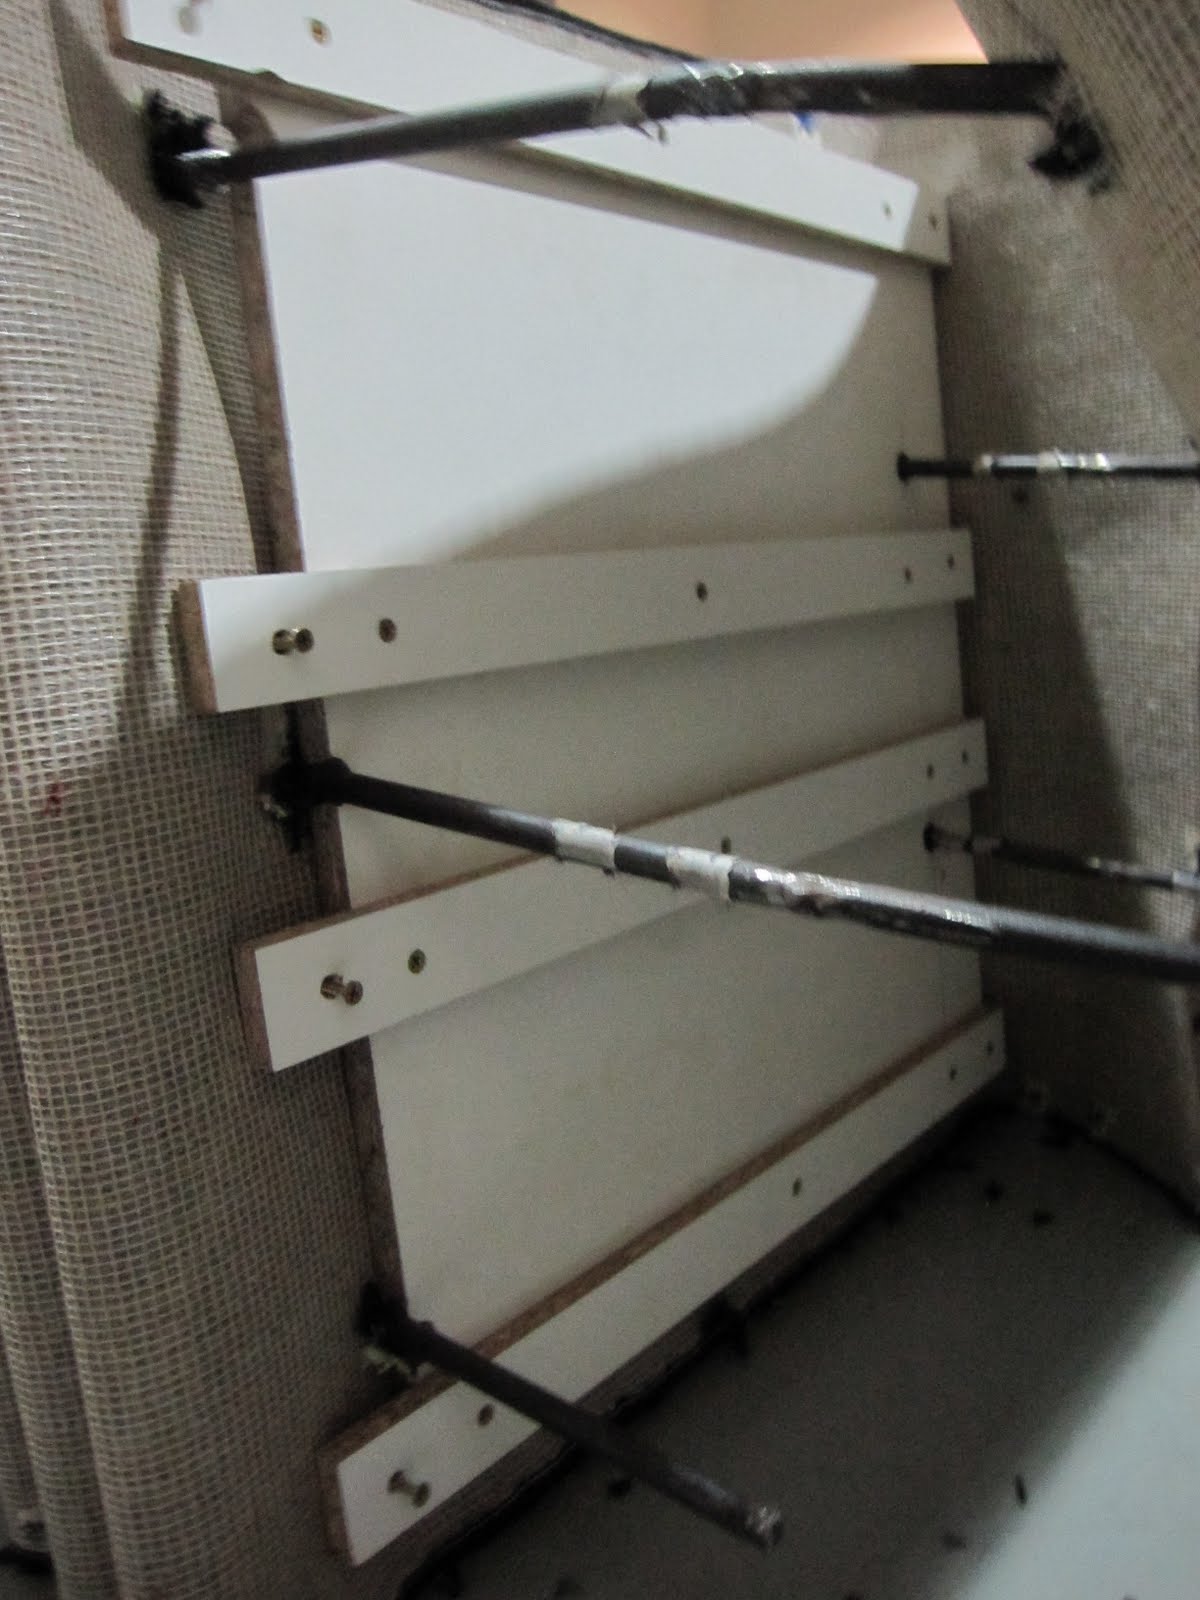
MDF boards were specially cut to insert the steel rods
 Look at all the pain we put through...
 Sweeping is very fundamental..
 After the bench is almost done, its time to take out the tapes on the bench
 The side of the carpet were sewn to hide the boards from people's view
 Wala!
Wala!
Curi Tulang Group by: Look at all the pain we put through...
 Sweeping is very fundamental..
 After the bench is almost done, its time to take out the tapes on the bench
 The side of the carpet were sewn to hide the boards from people's view
 Wala!
Wala!Kian Min, Jackyin, Ash


